PicoFlasher Tutorial
How to use a micro-USB Raspberry Pi Pico with PicoFlasher firmware to read/write Xbox 360 NAND (PHAT, Trinity, Corona 16MB/4GB).
What is PicoFlasher?
We can use a low-cost micro-USB Raspberry Pi Pico (RP2040) to read and write Xbox 360 SPI and eMMC NANDs. This supports all PHATs, all Trinity, and Coronas with 16MB and 4GB NANDs.
Huge thanks to the PicoFlasher developers for publishing the code and making this possible.
Firmware + J-Runner
It’s best to grab the .uf2 firmware files from the PicoFlasher GitHub Releases page:
https://github.com/X360Tools/PicoFlasher
For J-Runner, use a trusted build (for example, a maintained “J-Runner with Extras” fork) or the X360Tools branch when required for new PicoFlasher features.
Reference install images
Select your motherboard type below to view the appropriate wiring diagram and instructions.
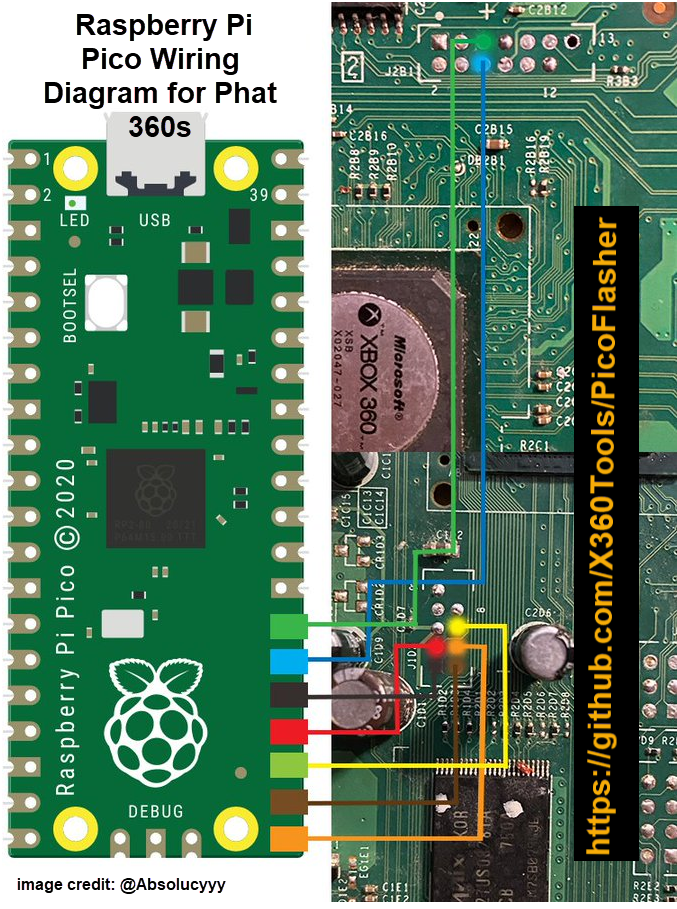
PHAT Wiring Diagram
Use the diagram below to wire your Pico to the PHAT motherboard. Double-check continuity and avoid long unshielded wire runs.
PHAT Installation Steps
- Identify your PHAT motherboard revision (Xenon, Zephyr, or Falcon).
- Solder the wires from PicoFlasher to the console following the diagram above (a header/cable setup helps a lot).
- Connect the wires to the PicoFlasher.
- Open J-Runner on your PC.
- Apply standby power to the console (PSU connected, console not powered on).
- Connect USB to the PicoFlasher.
- Click Read NAND in J-Runner.
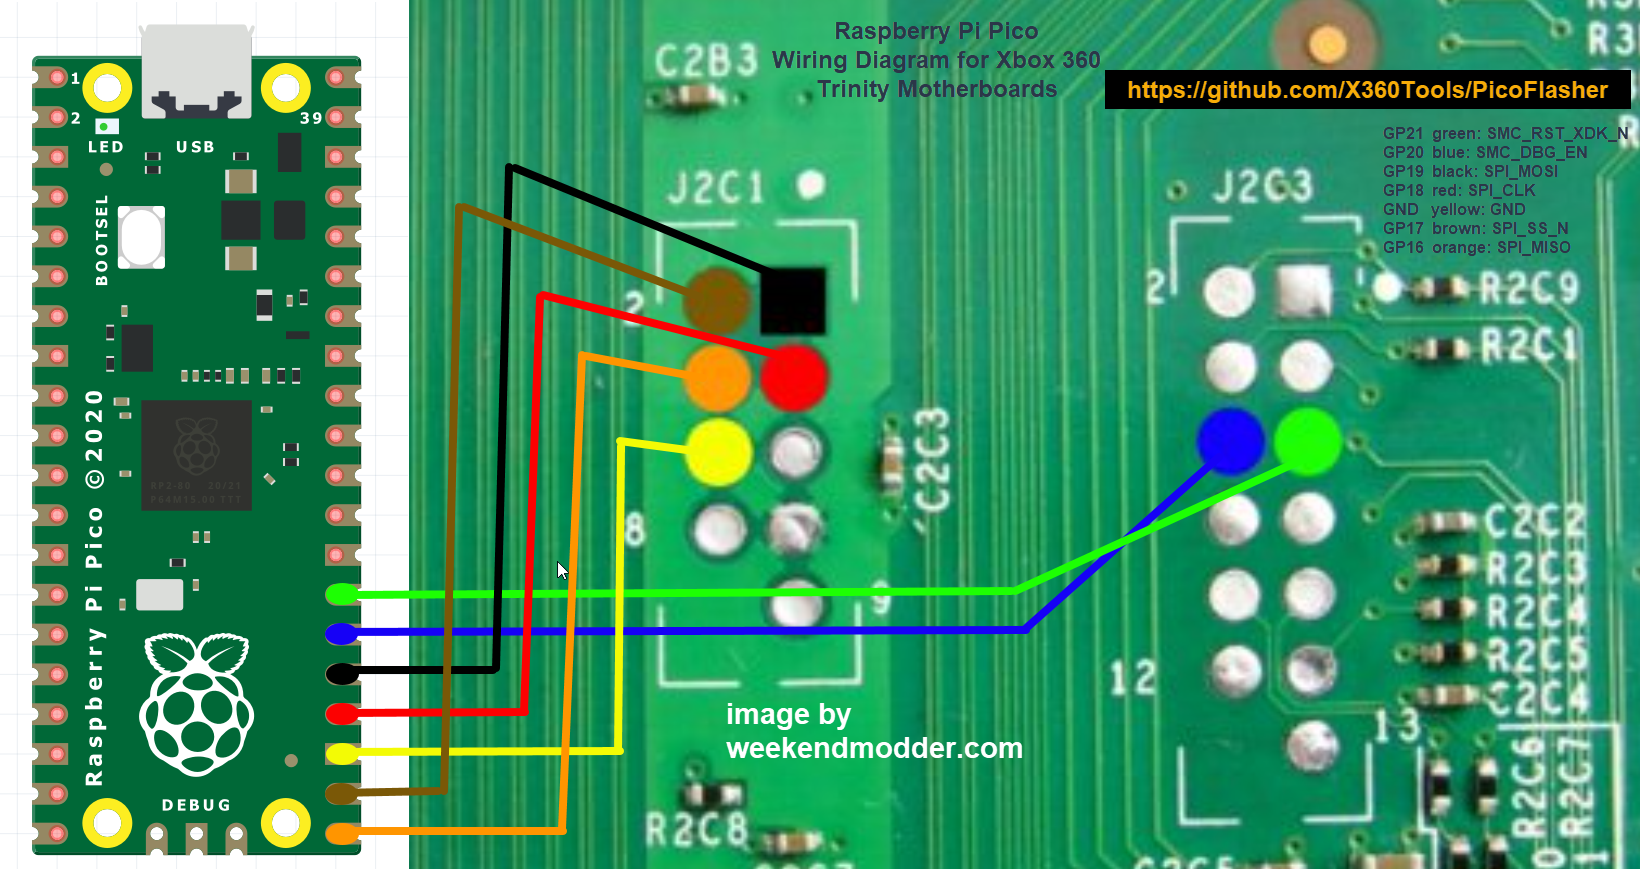
Trinity Wiring Diagram
Use the diagram below to wire your Pico to the Trinity motherboard. Double-check continuity and avoid long unshielded wire runs.
Trinity Installation Steps
- Solder the wires from PicoFlasher to the console following the diagram above (a header/cable setup helps a lot).
- Connect the wires to the PicoFlasher.
- Open J-Runner on your PC.
- Apply standby power to the console (PSU connected, console not powered on).
- Connect USB to the PicoFlasher.
- Click Read NAND in J-Runner.
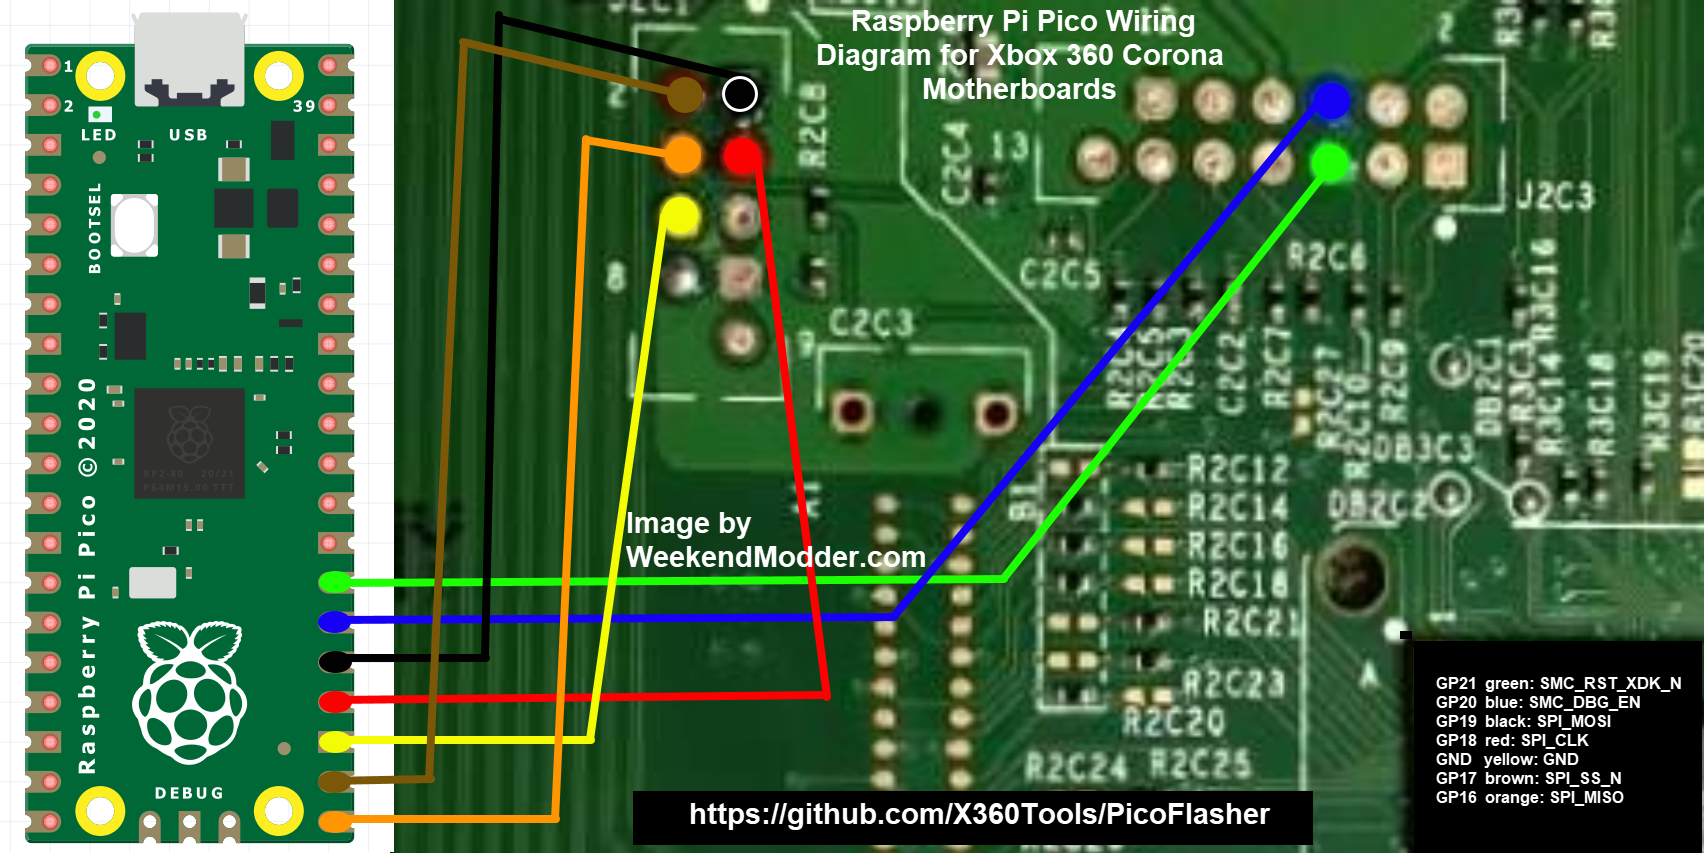
Corona Wiring Diagram
Use the diagram below to wire your Pico to the Corona motherboard. Double-check continuity and avoid long unshielded wire runs.
Important: On some Corona motherboards the resistor R2C10 near the J2C3 header may not be bridged. PicoFlasher requires R2C10 to be bridged for NAND read/write to work. If it's open, bridge it closed.
Corona Installation Steps
- Check if R2C10 is bridged. If not, bridge it closed before proceeding.
- Solder the wires from PicoFlasher to the console following the diagram above (a header/cable setup helps a lot).
- Connect the wires to the PicoFlasher.
- Open J-Runner on your PC.
- Apply standby power to the console (PSU connected, console not powered on).
- Connect USB to the PicoFlasher.
- Click Read NAND in J-Runner.
Corona 4GB NAND Notes
For Corona consoles with 4GB NAND, this requires PicoFlasher firmware v2+ and you may need a newer J-Runner build that includes 4GB support.
Recommended order for best success with 4GB NAND:
- Ensure R2C10 is bridged.
- Solder the wires from PicoFlasher to the console (a header/cable setup helps a lot).
- Connect the wires to the PicoFlasher.
- Open J-Runner on your PC (ensure it supports 4GB NAND).
- Apply standby power to the console (PSU connected, console not powered on).
- Connect USB to the PicoFlasher.
- Click Read NAND in J-Runner.
Bench tips (quick)
- Keep wires short, twisted where possible, and avoid routing near noisy power sections.
- Always verify dumps and compare multiple reads before writing.
- Label dumps with console type + date + board revision.